Difficulty: 2 (Beginner)
Time: 5 minutes
I decided to give tutorials a try and have seen how popular the “vector starburst” has become, so I decided to demonstrate a simple way to do that in Illustrator. There’s a pretty decent tutorial of how to do one in photoshop here, if you’re interested.
Video Tutorial | Image Tutorial
Part 2
This is what we will be creating:
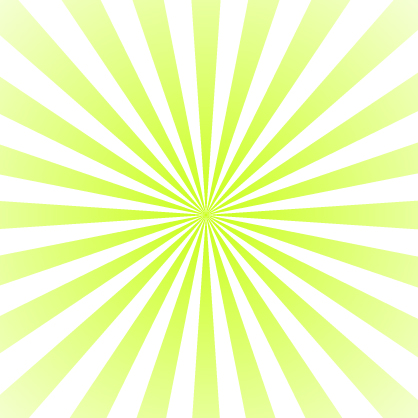
You can make yours in whatever color you want. I used all the web 2.0 colors such as green, pink and orange.
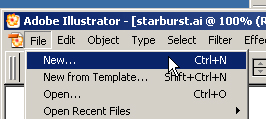
Step 1: Create a new Illustrator file. (File > New…)
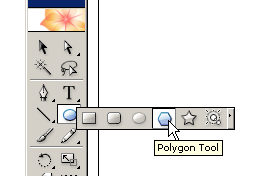
Step 2: Select the Polygon Tool (it’s in the circle submenu).
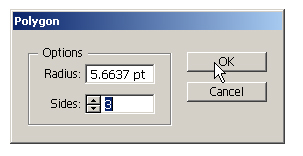
Step 3: Left click anywhere on the canvas. This will pop up a box that will allow you to specify a radius (size) and number of sides. The radius isn’t important (just as long as it’s not too big) but the sides needs to be set to 3 as shown above.
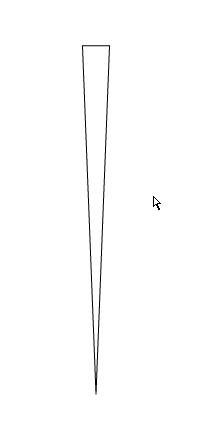
Step 4: Make sure you are using the selection arrow. You should have handles surrounding your triangle. Click the one nearest to the tip of your triangle and drag it to form the shape above. You may also need to drag the left or right handles in to squeeze it into this shape.
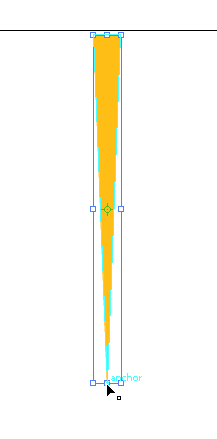
Step 5: In this step I have done 4 things:
- Modified the fill color of my shape, while removing the stroke.
- Turned on Smart Guides (View > Smart Guides) or (CTRL + U)
- Made a copy of my original shape directly on top (CTRL + C, CTRL + F) or (Edit > Copy, Edit > Paste in Front)
- Selected the rotate tool. (R)
My smart tags are on so we can make sure we rotate this shape directly on the top of the point.

Step 6: With the Rotate Tool, click once on the anchor at the bottom (or top) of your newly created and newly distorted triangle. Then hold shift and Click & drag your shape until it is perpendicular (90°) to the original shape.

Step 7: Repeat the “copy and rotate” steps until you have 4 total triangles, now in sort of a PLUS (+) shape.

Step 8: Highlight all your shapes by dragging across them all, or pressing (CTRL + A).
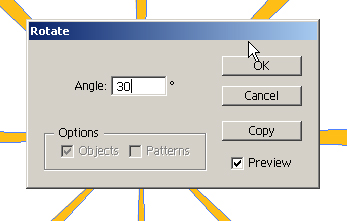
Step 9: This time we’re going to rotate in a different method. You can use the same method as before, but this is a different way. Go to Object > Transform > Rotate. This dialog allows you to type in exactly what angle you want to use. Now, depending on how many “rays” you want in your starburst will tell you what angle you want to rotate it. I decided to go with 24 rays, so I started with 45° and then pressed the “Copy” button. This makes a duplicate of your selection as well as rotates it to the specified angle. You can also check the “Preview” box to see what it will look like, once complete.
Do this again 2 more times, except, instead of using 45°, use 30° for both of these.

Step 10: If you followed the previous steps properly, you should end up with something similar to the above image.

Step 11: This step is a common method, but too difficult to get “just right”, but I’ll show you anyway. Duplicate the color of your rays in your color palette. (Select nothing on the canvas, then click your color, then click the New icon). Double click the duplicate color and change Process Color and CMYK. Now drag the slider about 12-18 percent down so it is darker than your original. Press “OK”.
Now create a new circle (with your new color selected). Send it to the back (CTRL + SHIFT + [). It should start looking close to what you want, but you would probably agree, it’s just not perfect.
I find the best method is in the next step.

Step 12: If you did not create a circle in the previous step, do so now and make sure it’s in the back of your canvas. Now fill the circle with your choice of starburst color. Then select all your rays. Be sure not to select your circle. Change the fill of those to Black.
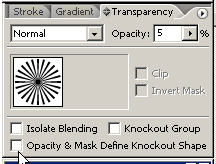
Step 13: With your rays still selected,under the Transparency palette, change the Opacity to 5%.

Step 14: Now you should be on the right track.
Don’t be hesistant to play with this design. Explore and try out different things. Make it unique.